Bell Pepper Pizza Bites

As soon as I made the decision to try timed nutrition I was excited and also really scared because as you know I am a foodie of all foodies and YES I want results but I also need to eat food that I absolutely enjoy because if I don't ... well, I will just fall off the wagon.

This new program that I am trying out tells you exactly how to place your foods through the day and when I saw that my blue container was placed with a veggie I was instantly heartbroken. This meant no more tortilla pizzas on Friday night so I GOT TO WORK and THIS recipe was born and my oh my and I so happy I came up with this one! 

It is like having pizza with zero guilt and ALL of the results and it is AMAZING oh and it reheats really well! I am sharing all of my time nutrition meals in my IG stories so if you would like to follow along check it out at Lisa_m_Hauck 

I am gonna give you the recipe to make 1 servings and you can double or triple this as you need too! 

Bell Pepper Pizza Bites.png

INGREDIENTS 

  • 1 green bell pepper. with 4 sides cut off to leave a little divet to add sauce and cheese into ( you can use any color you like, I prefer green)
  • 2 tablespoons of a clean Marinara sauce ( no added sugar) 
  • 1 oz of fresh mozzarella cut into small chunks 
  • A pinch of dried oregano
  • Salt and pepper to taste

DIRECTIONS

  1. Bring a small pan of salted water to a boil,  add the bell peppers and boil for 2-3 min just until slightly tender. ( do not overcook these or they will be too soggy)
  2. On a paper towel place cooked bell pepper and pat dry, salt and pepper as desired
  3.  Preheat oven to broil and get out a sheet pan placing the bell peppers right on the pan
  4. Add marinara sauce, cheese, oregano and pepper to the bell pepper pizzas
  5. Place under broiler just until cheese is bubbly and brown about 3 min. ( keep a close eye on these and do not walk away)

If you are making more than 1 serving ( I always do) then place them in a shallow storage dish and allow to cool. Place in the fridge and reheat in the microwave until warmed through and ENJOY!  


Sweet Potato Hash

I LOVE carbs it is not a secret ha! I know for a fact that is how I became 50 lbs overweight and I also have learned the difference between good carbs and carbs that are not so good for you. Nope, they are not all created equal and YES we ALL need carbs..... Literally, your brain functions on carbs so take them away from your diet and you will be foggy and let's not forget HANGRY. 

The #1 carb that you should be eating more of is sweet potatoes. They are so yummy and will keep you full and your body happy! Think I can chase my toddler around all day kinda energy. 

Sweet Potato photo.png
  1. I have been LOVING these for breakfast paired with some carmalized red onions and eggs. I have made these into a SIMPLE meal by pre-cooking the sweet potato because when the mood strikes and you need food the last thing I want to do is wait too long to make it. By that time I will end up grabbing something I should not have. 

SUPER SECRET NINJA TRICK is to scrub the skin, stab a few time ha, and then cook in the microwave. once cooled enough just cut them into little disks so they are ready when you are! 

INGREDIENTS 

  • 1 medium sweet potato
  • 1 tsp olive oil 
  • Salt and pepper to taste
  • OPTIONAL thin sliced red onion 

DIRECTIONS

  1. Scrub the sweet potato, poke a few holes with knife or fork.
  2. Place in Microwave ( I use the Potato feature ) cook until soft
  3. Allow a few minutes for cooling so you can cut the potato into disks leaving the skin on because there are so many nutrients in the skin. ( PREP TIP: you can stop here and once cooled put in the fridge then pop them out any time you want them)
  4. Preheat nonstick pan to medium-high heat, add oil. Once the pan is hot add your sweet potatoes ( I love to cook onions with this at the same time too) sautee for about 3 minutes on each side flipping until both sides are toasy brown and slightly crispy. 
  5. Salt and pepper to taste and ENJOY! 


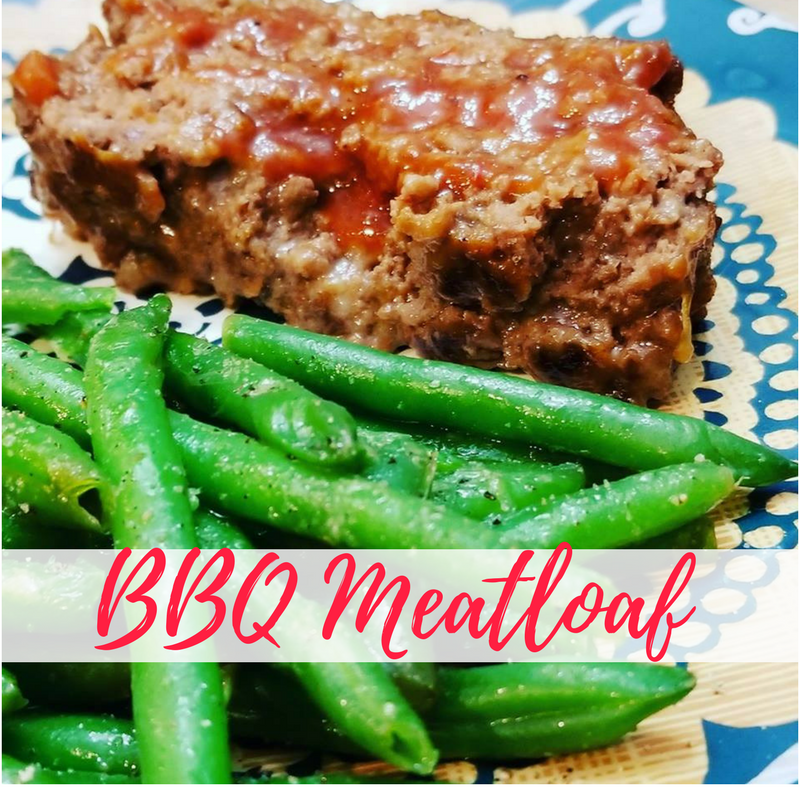
BBQ Meatloaf

I LOVE BBQ everything, bbq chicken pizza, bbq southwestern salads and I just have not found a Bbq that is low enough in sugar but I FINALLY came across one and I have found a WINNER. This particular brand I got at wegmans so search your local stores and see if they have it! 

I got to work looking for a family friendly recipe to use this with and I came up with a BBQ meatloaf that the whole family loved! 

BBQ Meatloaf.png

INGREDIENTS

  • 1 Pound of lean ground beef
  • 1/2 cup of plain gluten-free panko bread crumbs ( the whole wheat had sugar in it)
  • 1 tablespoon + 2 teaspoons Worcestershire sauce 
  • 1 tablespoon dijon mustard 
  • 4 tablespoons of bbq sauce ( Dinosaur Bar-B-Que original)
  • 1/2 teaspoon salt 
  • pepper to taste

DIRECTIONS

  1. Preheat 350 degrees and in a large bowl mix ground beef, panko, 1 tablespoon Worcestershire sauce, dijon mustard, and BBQ sauce with salt and pepper. Be sure to not over mix the meat
  2. Line a sheet pan with parchment paper ( less clean up) and shape the meatloaf into a long log shape. 
  3. Mix the remaining bbq sauce, honey and Worcestershire sauce and pour over top the meatloaf
  4. bake for 45 min, slice and serve. if you need you can always add a touch more BBQ after it is done. 

If you use portion fix I counted 1 slice as 1 red, 1 orange ( I did not account for the panko because it is likely about 1 tablespoon per slice) 


COPYCAT Chick-fil-A Nuggets

OK here is the deal! I love chicken nuggests like a 5 year does but they KINDA gross me out not knowing whats really inside of them. When eating out we have a few go to places and Chick-Fil-A is one of those places. 

I came across a recipe on 100 days of real food and thought I would try it but OF COURSE I could not leave well enough alone and I adjusted the recipe to make them a bit crispier and I also found it VERY difficult to find a clean whole wheat breadcrumbs. 

So naturally I got to work and these beauties were born... the kids were elated that I said we are having chicken nuggets for dinner and yes they are clean and meal plan approved. 

Chick-Fil-A.png

INGREDIENTS

  • 1 lb chicken breast
  • 1 egg 
  • 1 cup Plain Panko bread crumbs
  • 1/4 cup grated Parmesan cheese 
  • 1/4 teaspoon garlic powder
  • 1/4 teaspoon onion powder
  • 1/4 teaspoon paprika
  • 1/4 tsp salt
  • dash of pepper
  • olive oil

DIRECTIONS

  1. Dice chicken in to 1 inch peices
  2. Beat egg and leave in bowl
  3. Add panko, garlic powder, onion powder, salt, pepper and paprika to small bowl and mix well. 
  4. Bread chicken pieces by dipping in the egg first, then into the breading to coat and set aside. I suggest breading all the chicken and then working in batches to cook them. ( another tip use 1 had for the egg and the other for the breading mixture so your fingers don't get so gunky! 
  5. Heat pan with a good pour of Olive Oil on Med low about 4.5 let heat well add chicken to pan allowing to brown on all sides cooking. (Pro tip, the first batch takes the longest to brown up but the second batch heats much faster, consider turning the heat down a bit if needed and do not walk away) 
  6. Transfer nuggets to a paper towel while the other batches are cooking. 
  7. Cut a nugget to ensure it is cooked through and continue with further batches till check is all cooked ( pro tip, I wipe the pan out between batches and add a bit more oil.
  8. serve with ketchup or condiment you enjoy! 


Instant Pot Tikki Masala

OH MY GOSH! You KNOW how much I have been enjoying my Instant Pot. I swear it is a tool that every woman needs in her life! Now that things are starting to cool down it is time to break out the comfortimg bowls of goodness and this is at the TOP of my list this year hitting the spot like no other! 

Josh was asking if there was enough for seconds after he took the first bite haha! I typically save some of our dinner for leftovers the next day but this made plenty for our dinner plus lunch and his second helping so we were all happy! 

Copy of Strawberry Cheesecake Bites (4).png

INGREDIENTS 

  • 1.25 pound of boneless skinless chicken breasts ( you can use boneless skinless chicken thighs as well)
  • 1 tablespoon of butter 
  • 1 tablespoon coconut oil
  • 1 large onion diced
  • 1 tablespoon of Garam Masala ( this is a powdered spice that you can find in most stores)
  • 2 teaspoons of salt
  • 1 teaspoon Cumin
  • 1 teaspoon tumeric
  • 1 teaspoon Chili powder
  • 2 tablespoons of minced garlic 
  • 1/4 teaspoon ground ginger ( or grated fresh if you have it)
  • 1 can diced or crushed tomatoes 
  • 3 tablespoon of Plain Greek yogurt or 1/4 cup coconut milk canned 
  • 3 tablespoons of almond butter or Peanut butter or cashew butter
  • OPTIONAL LIME WEDGES
  • OPTIONAL CHOPPED SALTED PEANUTS 

DIRECTIONS

  1.  Press Saute button on instant pot, add butter and coconut oil along with the diced onion and sautee for 3-5 min
  2. In the mean time measure out all spices add them to onion mixture and stir well for 1 min
  3. Add Garlic and tomatoes 
  4. Add chicken breast to mixture and ensure that they are covered in the sauce
  5. Secure lid on Instant Pot turning it to Manual High 16 min and ensure the vent is closed 
  6. When done release the steam, remove the chicken and shred it. ( I prefer to transfer it to my kitchen and use the paddle attachment to shred the chicken quickly but you can also use 2 forks)
  7. Add shredded chicken back into sauce and stir.
  8. Serve just as is or over rice if desiered. I topped mine with a wedge of lime and some Salted peanuts for a crunch!  ENJOY!